
Latest Version
Download NowMore About Epson M100 Adjustment Program
Epson M100 Adjustment Program: A Comprehensive Guide
The Epson M100 is a robust monochrome inkjet printer known for its efficiency and quality, commonly used in office and small business environments. Like any printer, it may occasionally require maintenance or adjustment to keep it performing at its best. The Epson M100 Adjustment Program is a crucial tool for servicing and fine-tuning the printer's functions, especially for tasks like resetting the ink counters, cleaning the printhead, and aligning the printer. In this article, we’ll explore the Epson M100 Adjustment Program, its significance, and how to use it to maintain your printer in top condition.
What is the Epson M100 Adjustment Program?
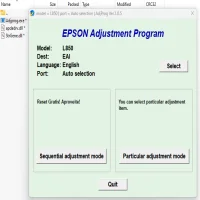
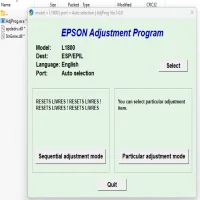
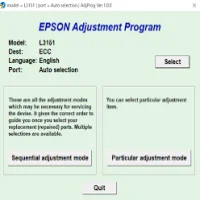
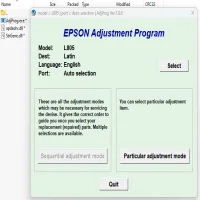
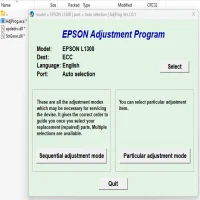
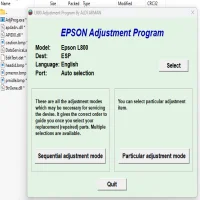
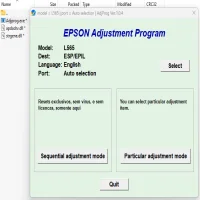
The Epson M100 Adjustment Program is a utility tool designed for technicians and advanced users to perform maintenance tasks that go beyond what the printer’s standard menu offers. This program allows users to access hidden functions for printer diagnostics, troubleshooting, and resetting. It’s especially useful for resolving issues like print head errors, ink waste, or any mechanical faults that standard troubleshooting methods can’t address.
The program is typically used for resetting counters and performing a range of tests. The primary functions of the Epson M100 Adjustment Program include:
- Ink Waste Reset: Resets the waste ink counter, which is vital after a certain number of pages have been printed or ink cartridges replaced.
- Print Head Cleaning: Performs deep cleaning cycles to ensure the nozzles are clear and the ink flows correctly.
- Scanner and Print Head Alignment: Ensures the printhead is correctly aligned for sharp, clear printouts.
- Service Mode Activation: Allows users to put the printer into a service mode, enabling more complex diagnostic tests and adjustments.
- Error Codes Reset: Clears error codes, particularly those related to ink waste or printhead misalignments, which can prevent the printer from working correctly.
Why is the Epson M100 Adjustment Program Necessary?
The Epson M100, like all printers, accumulates waste ink and other errors over time. When these issues aren’t addressed, they can cause printing problems or even printer failures. The Epson M100 Adjustment Program provides an efficient way to reset ink waste counters and resolve error codes, helping to extend the life of your printer and avoid costly repairs.
How to Use the Epson M100 Adjustment Program
Using the Epson M100 Adjustment Program is relatively simple, but it requires careful attention to detail. Here is a step-by-step guide on how to use the program:
-
Download the Adjustment Program: The first step is to download the correct version of the Epson M100 Adjustment Program from a trusted source. Make sure you are using the version that matches your printer’s model and operating system.
-
Install the Program: Once the program is downloaded, follow the installation instructions. The program is usually a standalone software that doesn’t require additional software for installation.
-
Connect Your Printer: Ensure that the Epson M100 printer is connected to your computer via USB and powered on. The program will need to communicate with the printer to perform adjustments.
-
Launch the Program: Open the Epson Adjustment Program. You may need to select your printer model from a list if there are multiple printers connected to your computer.
-
Access the Required Function: The program’s interface provides several options. Depending on your needs, you can select functions like ink waste reset, head cleaning, or error code reset.
-
Follow On-Screen Instructions: Each function will come with specific on-screen instructions. Follow them carefully to ensure the process completes without interruption.
-
Test the Printer: After making adjustments, it’s a good idea to print a test page to check that the printer is functioning correctly.
Precautions and Considerations
While the Epson M100 Adjustment Program is an incredibly useful tool, there are a few precautions to keep in mind:
- Use with Caution: This program is intended for users with technical knowledge. Incorrect use can lead to further issues or void warranties, so proceed carefully and follow the instructions precisely.
- Backup: Always back up your data before using any maintenance program, especially when using third-party software.
- Regular Maintenance: Resetting counters and cleaning the printhead is only a part of regular maintenance. Be sure to perform routine checks on the printer, such as inspecting ink levels, cleaning the printer exterior, and ensuring the paper feed is free of obstructions.
Conclusion
The Epson M100 Adjustment Program is an essential tool for anyone looking to maintain their printer in optimal working condition. By allowing users to reset error codes, clean the printhead, and manage ink waste, it helps prevent issues that could lead to costly repairs or downtime. As with any maintenance tool, it should be used responsibly and with care to avoid unintended consequences. Regular maintenance, combined with the Epson M100 Adjustment Program, ensures that your printer will continue to deliver high-quality prints efficiently and reliably.
Rate the App
User Reviews
Other Apps in This Category


Popular Apps